A routing policy lets you direct the incoming logs into different repositories in the LogPoint. You can use either Key Present or Value Matches criteria to configure a routing policy.
Go to Configure >> Entities >> Routing Policies.
Select the LogPoint instances where you want to configure the routing policy. You can select multiple LogPoint instances of different pools.
Click Next.
Configuring the Routing Policy
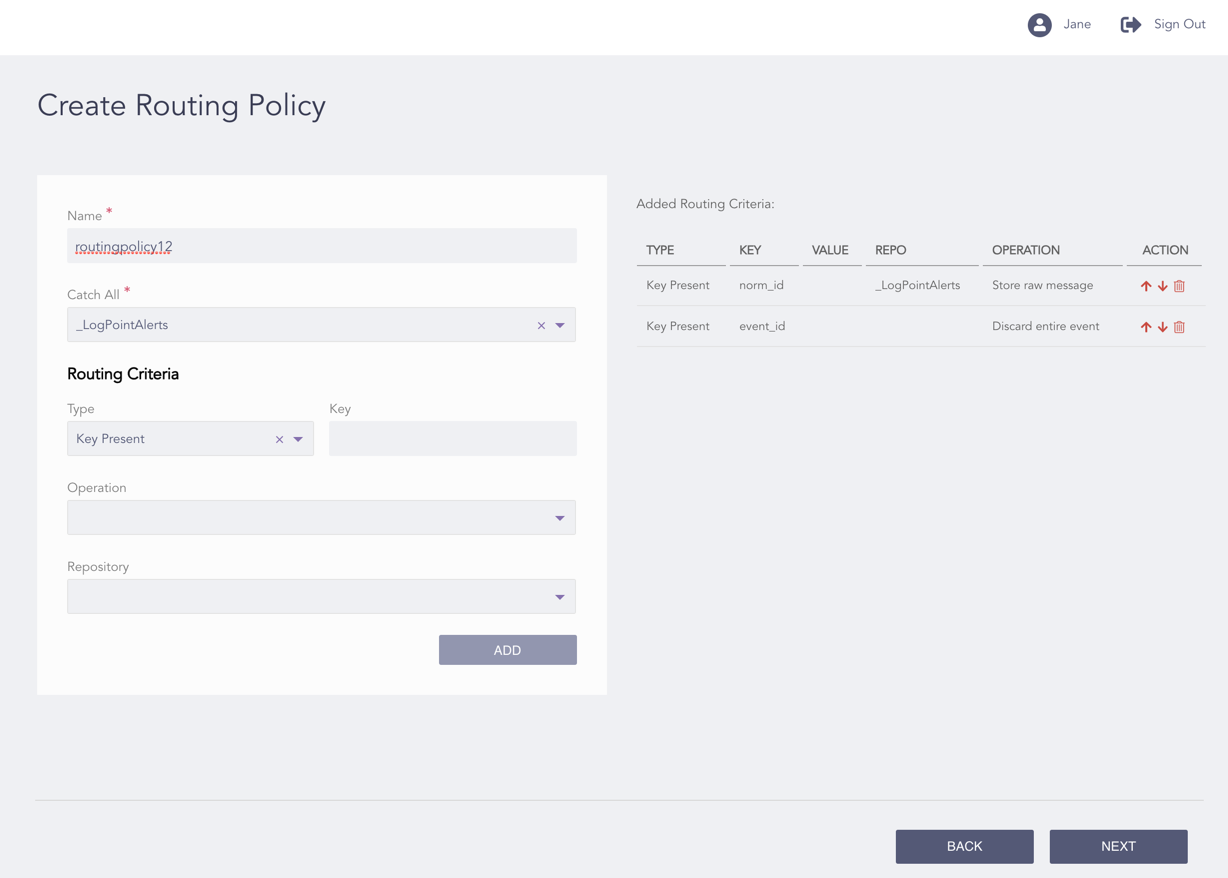
Enter a Name.
Select a Catch All repository. All the logs that do not meet the Routing Criteria are stored in the Catch All repository.
Select a routing criteria Type. The type can be either Key Present or Key Present Value Matches.
If you select Key Present, enter a Key. The routing criteria is applied to the log messages containing the provided key.
If you select Value Matches, enter a Key and its Value. The routing criteria is applied to the log messages containing the provided key and value.
Note
The Key for both Key Present and Key Present Value Matches types must be a normalized field name of the log messages.
Select an Operation:
Store raw message stores both the raw message and the normalized data in the target repository.
Discard raw message discards the raw message and stores the normalized data only.
Discard entire event discards both the raw message and the normalized data.
Select the target Repository for the routing criteria.
Click Add.
Note
You can configure a routing policy without a routing criteria.
You can add multiple routing criteria to a routing policy.
You can click the Move Up and Move Down icons from the Action column of a criteria to re-order it. LogPoint compares the criteria to the incoming logs to store the data to the target repo based on the order of the criteria.
You can click the Delete ( ) icon from the Action column of a criteria to delete it.
Click Next.
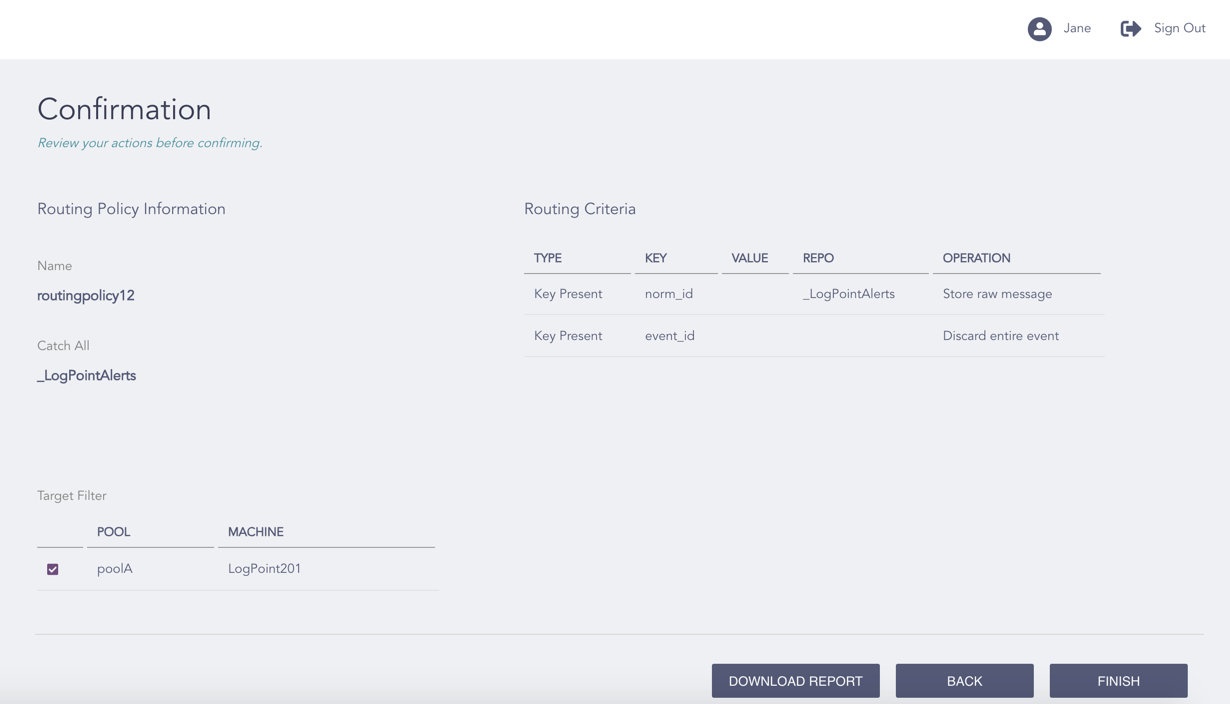
Confirming the Changes
Review your changes. You can go Back to make any changes if necessary.
Note
Click Download Report to save the summary of the task in PDF.
Click Finish.
Click OK.